Place text or a drawing as an engraved feature on the part. For the Drawing option the support file type is .dxf.
In the Prepare tab, click Engrave.
Select Text or Drawing.

Type text in the field and select the font. For a drawing, click
Import and navigate to the drawing file.
The Insert Part Name option will add
the part name into the text box when checked.
Place and re-size the engraving with the handles.

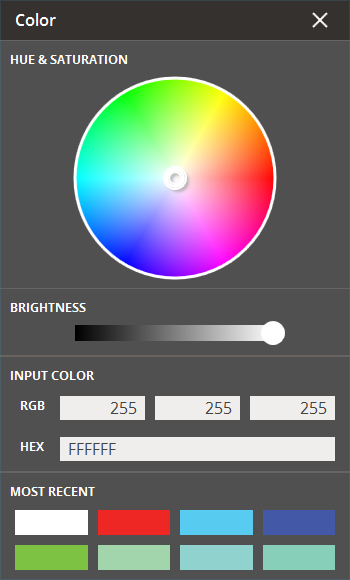
Check the Color check box to enable coloring when the Engraving Mode is Extrusion.
Enter a HEX code for color or select Edit
to bring up the Color options interface.
Check the Fixed Size check box to fix the size of text or drawing data. If a .DXF drawing file is imported and used for engraving, the fixed size is the height of the image.

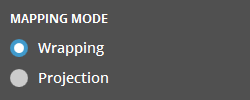
Choose mapping method, Wrapping
or Projection. Wrapping will wrap the
engraving around the part. Projection will project the engraving unto
the part.
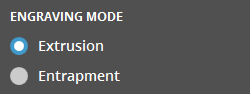
Choose engraving method, Extrusion
or Entrapment. Extrusion will extrude
the text or image onto the object while Entrapment
allows the creation of new volumes/objects encapsulated within
existing objects.
Click Engrave. The engraving will be previewed.
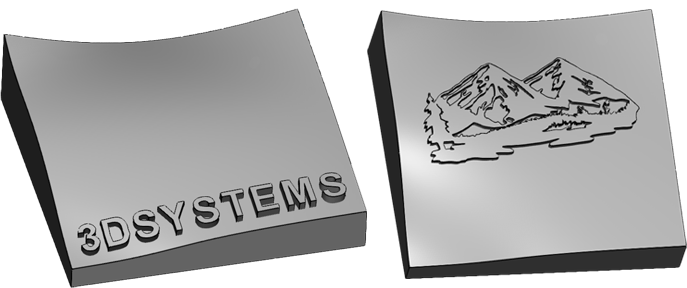
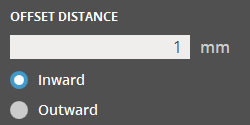
For Extrusion, select offset distance and inward or outward
direction. Ensure that the offset is thick enough to create a printable
result.
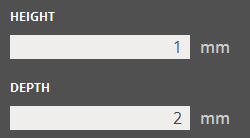
For Entrapment, height is the "thickness"
of the newly entrapped volume, while depth
controls where the new volume starts within the primary object.
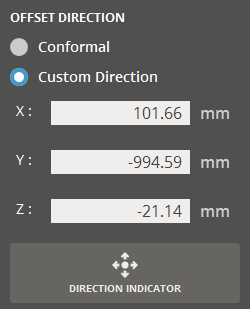
Choose direction for the engraving:
Conformal - Follows the contour of the part.
Custom Direction - Set direction by
typing a vector or by selecting a face or a line on the part.
Note: Enable Sharp Edge in the View panel to see the engraving clearly.
Entrapment has the check option New Part to add the entrapment as a new subpart in the parts list.
Click Set.
Note: The options in the Engrave command are persistent until clicking Close for repeatable process.