Supported Printers:
SLA-printers
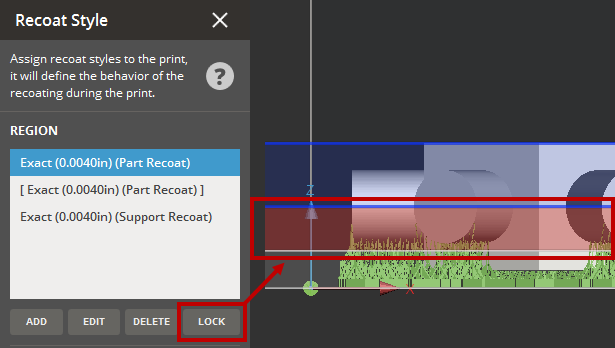
The Recoat Style command lists the Recoat Styles assigned different regions of the current platform. Assigning a recoat styles to the print job, it will define the behavior of the recoating process during the print. It is assigned in layers to the entire print build. From this dialog, you can Add, Delete or Edit regions.
To perform any of these button functions, you must first select the region to which you want to change. You can select only one Recoat Style Region at a time.
Add a Region
To add a recoating style region, select a layer to split and click Add Z Range ![]() .
.
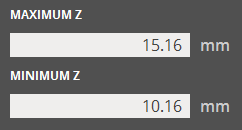
Resize a Region
To resize a region, drag the top or bottom plane.
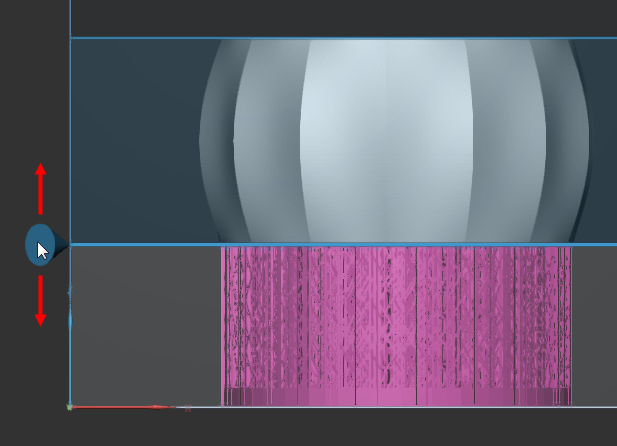
Or enter the exact height in the command panel.
Lock the range of a Region
To lock the range of a region, select it and then click Lock
![]() .
This prevent the range from being modified by mistake.
.
This prevent the range from being modified by mistake.
Remove a Region
To remove a region, select it and then click Delete
![]() .
.
Copy and Paste a Region

To copy a region, select it and then click Copy
![]() .
.
To paste the copied region onto an existing region, select the target
region and then click Paste ![]() . The parameters of the
copied region will overwrite the selected region.
. The parameters of the
copied region will overwrite the selected region.
Import or Export Recoat Styles

To import or export recoat styles as an .XML file, under the Import/Export
option and click Import ![]() or Export
or Export ![]() .
.
This dialog allows you to edit the parameters of the platform's recoat style. You can edit parameters that are not grayed out. If you hover the mouse over a parameter, a pop-up box will appear. In most cases, it will display the default value and the range within which the parameter can be edited. In a few cases, it will direct you to pick a value from a list of valid entries.

New Recoat Style preset:
Click the Edit button under the Region
Enter the recoat style parameters.
Click
the Add button ![]() .
.
Enter a name and click Set.
Click Set.
Edit a Recoat Style preset:
Click the Edit button under the Region
Selecting the recoat style to change from the Recoat Style drop-down.
Modify the recoat style parameters.
Click Update ![]() or click Restore
or click Restore ![]() to revert the changes.
to revert the changes.
If necessary, click Rename ![]() to rename the selected recoat style and then change to a new name
in the Name box.
to rename the selected recoat style and then change to a new name
in the Name box.
Import a Recoat Style preset:
Click the Edit button under the Region
Click the Import button ![]() below the Recoat
Style drop-down.
below the Recoat
Style drop-down.
Navigate to the recoat style file and click Open.
Note: Crossing import feature from recoat part to supports and vice versa is allowed.
Select the name for the recoat style and click Set.
Export a Recoat Style preset:
Click the Edit button under the Region
Select the preset from the Recoat Style drop-down.
Click the Export button ![]() below the Recoat
Style drop-down.
below the Recoat
Style drop-down.
Navigate to where you want to save the file, give it a name and click Save.
This will create a .styleddd file with your selected recoat style.
Delete a Recoat Style preset:
Click the Edit button under the Region
Select the recoat style preset to delete from the Recoat Style drop-down.
Click Delete ![]() .
.
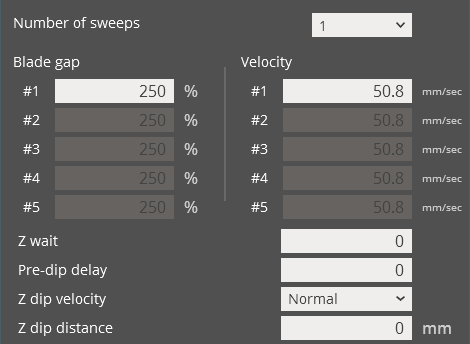 |
Edit Recoat Style Parameters Number of sweeps - The number of sweeps for this style. A recoat style may use up to five sweeps, each with a separately defined Blade Gap Percentage and Velocity. Blade gap - Used in concert with the layer thickness to define the clearance (or distance between the bottom of the recoater and last layer of the part) at time of sweeping. This parameter can also be called the Gap Percent. Note: The Preferred Blade Gap is calculated with Layer Thickness (LT) and its Gap Percent (G) and stored in the SLA build file. The calculation of Preferred Blade Gap (RBG) uses unit of INCH.
(For example) LT = 0.006", G% = 250 then, PBG = (250 * 0.006"/100) - 0.006" = 0.009" Velocity - The velocity of the blade when it sweeps. Z wait - The number of seconds allowed for the resin surface to stabilize after recoating and before the laser begins to draw the next layer. Large-platform machines have an inherent Z Wait of about five seconds to accommodate beam profiling. Pre-dip delay - The number of seconds the elevator pauses before a new layer of liquid resin is applied. Used with certain resins, this pause allows the part to cure more thoroughly before the next layer is created. Z dip velocity - The velocity (Normal, Medium or Slow) at which the elevator moves between layers.
This option affects elevator velocity only during the build program. Z dip distance - The distance the elevator dips during the recoating process. |