Scaffold

Create a scaffold under selected parts. It is similar to an extra support for a fragile part. The scaffold does not touch the part.

Note: Click Simple UI to switch between the simple and the advanced User Interface. In the Simple UI, only the tools for minimum workflow are visible.


The scaffold has several uses:


  1. In the Print tab, click Scaffold.

  2. Select parts where you want to set up scaffolds.

  3. Expand the Parameters option.

  4. Adjust the options and click Set to create scaffolds under the selected parts.

    Note: You will be warned that the selected parts will be moved upward to create scaffold. Click OK to continue.


Parameters

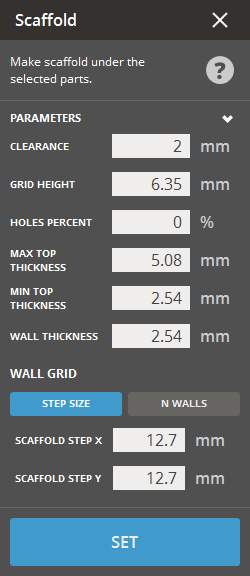
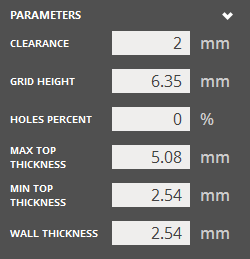
Clearance (Min. 0mm) - Sets the clearance between the part and the scaffold.

Grid Height (Min. 0mm) - Sets the height of the grid.

Holes Percent (Min. 0% - Max. 100%) - Will create holes to drain access core material from the scaffold.

Max Top Thickness (Min. 0mm) - Sets the maximum thickness of the top part.

Min Top Thickness (Min. 0mm) - Sets the minimum thickness of the top part.

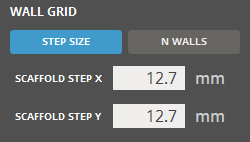
Wall Thickness (Min. 0mm) - Sets the thickness of the walls.


Wall Grid

Define the wall grid by using either Step Size or N Walls.

Step Size

Scaffold Step X (Min. 0.1mm) - Distance between walls in X axis.

Scaffold Step Y (Min. 0.1mm) - Distance between walls in Y axis.

N Walls

Walls X (Min. 0) - Number of walls in X axis.

Walls Y (Min. 0) - Number of walls in Y axis.