 Hollow
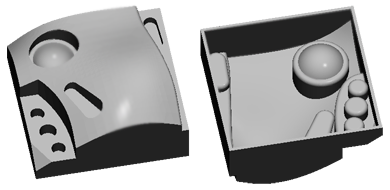
Make a solid part hollow to save print material and weight. Use the clipping function in the View dialog to see the hollow inside.
Note:
(NextDent 5100 Printer) Click
Simple UI ![]() to switch
between the simple and the advanced User Interface. In the Simple UI,
only the tools for minimum workflow are visible.
to switch
between the simple and the advanced User Interface. In the Simple UI,
only the tools for minimum workflow are visible.
In the Prepare tab, click Hollow.
Select the part you want to hollow out.
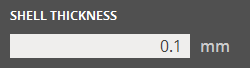
Specify the desired shell thickness by entering a value in the Shell Thickness.
Click Set to apply the changes.
Note: For most printers, you need to add material removal holes to print the hollow part. Use the Holes
 or Split
command.
or Split
command.