Analyze and fix defects of the part mesh.
Parts can be fixed in two ways:

In the Prepare tab, click Fix.
Select the Automatic Fix, or Manual Fix tab.
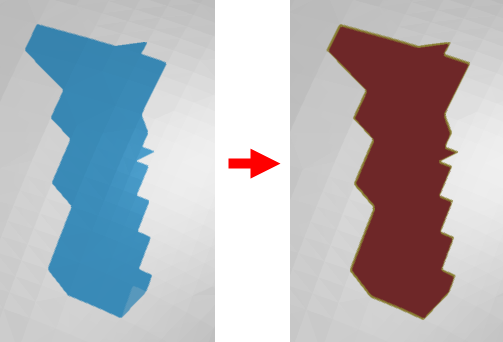
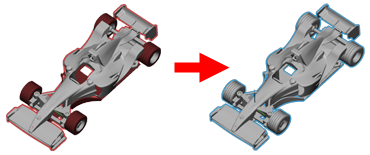
Select parts. If a part is outlined red it is analyzed to contain errors.
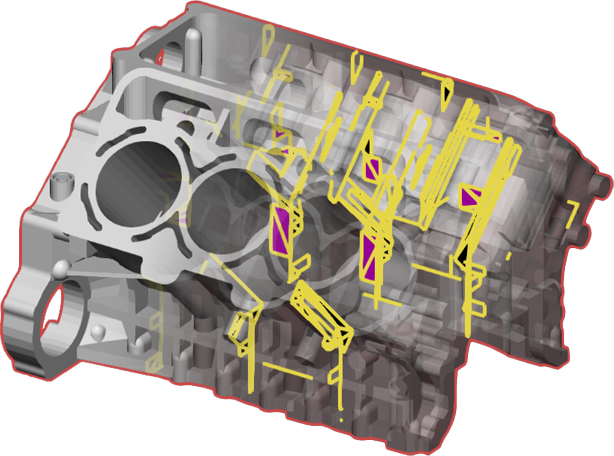
The part will be analyzed for defects and all detected defects will be shown on or inside the part.
Defects can automatically be detected. Make sure that all defects that need to be fixed are selected.
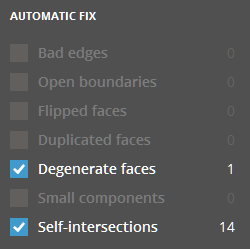
Bad edges - number of non-manifold edges.
Open boundaries - number of open boundaries.
Flipped faces - number of flipped faces with incorrect normal direction.
Duplicate faces - number of duplicated faces.
Degenerate faces - number of degenerate faces. The tolerance for detecting degenerate faces can be specified in the Preferences.
Small components - number of small components.
Self-intersections - number of self-intersections.
Click FIX. The application will try to repair all selected defects.
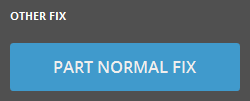
To automatically fix the part's normal, select Part Normal Fix.
If all defects are successfully repaired, the part will be outlined blue.

Note: Not all defects can be fixed, check the resulting part after running the command.
Use manual fix to fix errors that Automatic Fix is unable to do, or if the result is not as expected. You can fill holes, fix part normal or delete faces.
Fill holes manually for more control, of for holes that are to complex for automatic fix.
In the Manual Fix tab, click Fill Holes.
Total Holes shows the total amount of holes in the mesh. Use the arrows to navigate between the holes.

Note: If the holes are inside the part, they will not be visible in the 3D view. Enable transparent shading in the View panel to see holes inside the part.
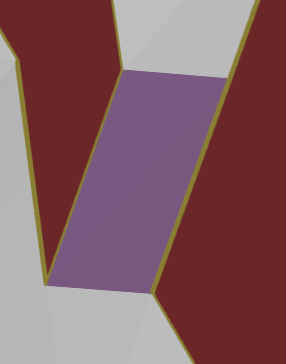
To fill a hole, click on it.
Connect Options will determine the way the holes are filled in.
Curvature - Considers the edge curvature.
Tangent - considers only the angle of the edge vector.
Flat - Create a flat patch to fill the hole.
Use the Bridge tool to bridge gaps, it can make automatic fills possible even for complex holes.
To create a bridge, first select an edge on one side of the hole. Then select an edge on the other side of the hole.
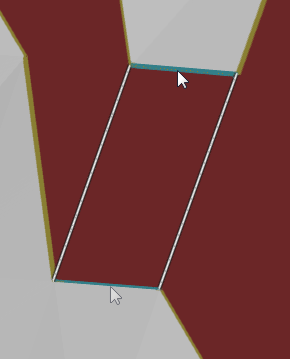
A bridge face will be created.
Show Filled Triangles toggles colored faces.
Select faces using the brush or rectangle. Hold Shift to add faces to selection, hold Ctrl to remove faces
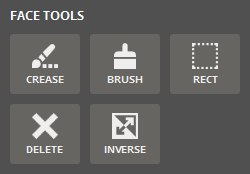
![]() Crease
Crease
Select faces by growing selections. After you select a face on the part, click and drag the mouse pointer upward to increase the sensitivity of the selection. The selection is dynamically increased. Dragging the mouse pointer downward has the opposite effect, and decreases the sensitivity of the selection.

![]() Brush
Brush
Select faces by drawing on the part.
![]() Rect
Rect
Draw a rectangle to select faces.
![]() Lasso
Lasso
Draw a closed loop on the part. The loop automatically closes when releasing the mouse button and faces inside the loop are selected.
![]() Delete
Delete
Click Delete to delete the selected faces.
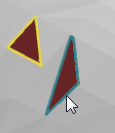
To invert a subpart's normal, click Inverse and select the faces.
Face normals will be flipped.
Note: You can also use automatic normal fix to repair the part's normal.
See Also